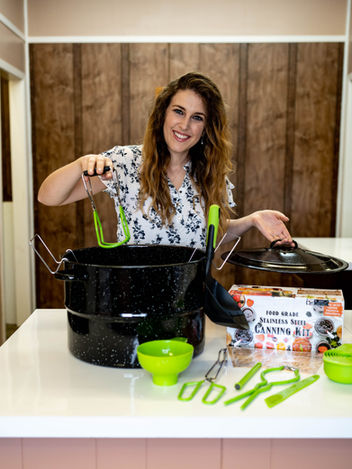
What Foods Can You Preserve?
Water bath canning is ideal for preserving high-acid foods. Here are some of the best options:
Fruits (peaches, apples, berries)
Water bath canning works well with a variety of fruits, allowing you to enjoy seasonal harvests throughout the year. Whether you're preserving sweet peaches, tart apples, or juicy berries, this method helps maintain the flavor and texture of the fruit. Preserving fruits is also a great way to make fruit spreads, syrups, or pie fillings that can be enjoyed later.
Jams and Jellies
Perfect for preserving fruit spreads, jams, and jellies. The high sugar content in these foods helps to preserve them naturally while giving them a thick, sweet consistency. Water bath canning ensures these spreads stay fresh for months, and they make wonderful gifts or pantry staples for your household. You can experiment with different fruits and flavors, from classic strawberry jam to exotic combinations.
Pickles and Relishes
This method is great for making homemade pickles, cucumber relishes, and other vinegary condiments. The acidity from vinegar combined with spices and vegetables makes pickles and relishes ideal candidates for water bath canning. Whether you’re making classic dill pickles, spicy jalapeño relishes, or sweet bread-and-butter pickles, this method helps preserve their crunch and vibrant flavors.
Tomatoes (with added lemon juice or citric acid)
Tomatoes can be safely preserved in a water bath when acid is added, ensuring a proper seal and safe storage. This is essential, as tomatoes are borderline acidic, and adding lemon juice or citric acid boosts the acidity to prevent bacterial growth. You can can whole tomatoes, crushed tomatoes, or tomato sauces, making it easy to enjoy fresh, homemade flavors in your cooking all year long
Guide to water bath canning:
1. Fill the stock pot with 11 quarts of water and place on a large stovetop burner. 2. Set the jar rack (If you are using your own rack, please ensure that you rack benefits from small bump like stands which keeps the rack proud from the bottom of the pot to promote water flow under the jars). 3. Pre-heat water to warm but not boiling (if you have specific instructions on the amount of water to use for your process, you can use the measurements on the inside of the pot prior to adding the jars). 4. Follow the directions in an approved canning guide to prepare and fill the jars with the product you are going to process. 5. Place your prepared, hot jars on the canning rack. 6. Pull up on the handles and carefully and slowly lower the rack down into your warm water. 7. Place lid on pot and ensure the lid is properly seated on the pot. 8. Make sure the tops of the jars are covered by at least 1-2 full inch of water. If needed, add enough hot water to fully cover the jars. 9. Turn your burner on HIGH so the water comes to a vigorous boil. 10. Adjust the burner so that it maintains and even rolling boil throughout the entire processing time. Usually this will be much lower than where it was set for step 10 when the water was coming up to a boil. If the top lid is lifting up and/or spitting water from the edges this is an indication that you have the heat turned up too high. Slowly reduce the heat until this stops but water is still at a rolling boil. You only need enough heat to maintain a slow rolling boil. 11. When the processing time is finished, turn off the heat, remove the lid (by tilting it away from you to avoid steam burns), and let stand for 5 minutes before removing jars. This cool down period is necessary to ensure the jars are properly processed. Skipping this step can result in under processed jars.
%20right%20facing_pn.png)


